Showing posts with label mojave. Show all posts

Tuesday, June 21, 2016

Desert Heat

115 Degrees Fahrenheit. In the shade. On the East side of the house. At 5:00 PM CST

One could say that is is just a little warm today here in the Mojave Desert on June 21st.  This is day three of temperatures over 112 for us here in Sunset Zone 9a in Fabulous Las Vegas.  We are on the East side of town but low enough at the base of the foothills that it's not the coolest part of town. That would be up on the slopes of Mount Charleston, where it seldom exceeds 95.  But there are warmer spots such as down in Laughlin, NV where it got up to 120 yesterday. 

So, what does a gardener do when it's this hot? Try to keep perennials as comfortable as you can.  That means three things: mulch, shade and water.  Mulch we've already taken care of as mentioned in previous posts.  We've supplemented it a bit with the stems of 'bonus plants' which have either ended their annual life cycle already and/or succumbed to the heat. 

Dead 'bonus plants', dormant Bermuda grass (also bonus) and wood chips insulate the soil here.   


In the case of this West facing car port, all we can do really is try to insulate the creeping acacia with mulch and try to keep a few standing 'bonus plants'. 

Tree and shrub branches under cloths keep these shelves shady.


We've also amped up the shade with trimmed limbs and cloth on the shelves along the East wall. As well as moving more shelves over there to help get more of the plants into afternoon shade.  The big elm tree helps (and the tree itself is doing well thanks to the soaker hoses) shade the plants for part of the afternoon, but unfortunately, the setting sun gets under it in late afternoon. 


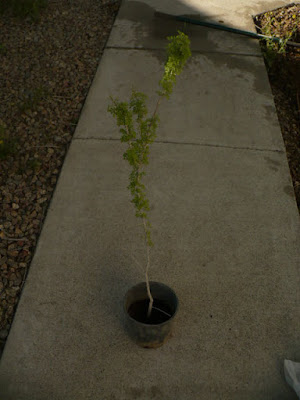
Our new catclaw acacia will someday be able to handle the heat fine on its own, but it's still a little sapling, so we are trying to help it out with extra afternoon shade......
This old lawn chair is just right for PM shade for our little catclaw acacia.


......courtesy of an old lawn chair that I keep around even though I probably should get rid of it.  I'm glad I kept it this year as it's fairly tightly woven mesh back is just right to give this little catclaw acacia some afternoon shade when the heat is the worst. 

Then, there is water.  It's tricky to deal with in this heat as you don't want to over-water anything and drown the roots. On the other hand, plants evapotranspirate (a combination of purely physics based evaporation along with plant energy requiring transport of water from roots to the rest of the plant)  and use water to cool themselves more than what they actually use to grow. This is especially the case when it is so hot outside. It's one thing for a plant to keep its cells cool while they grow, respire and (in some cases) carry out photosynthesis - all of which produce heat in the plant.  It's quite another when the air outside the plant is even warmer than the plant's normal temperature. 

When that happens, most plants will take up more water than usual as long as it isn't too hot.  When it gets above 80, most plant processes begin to slow down and growth usually stops.  Almost all plant processes stop when it gets well above 100.  Then the plant enters a sort of dormancy state but it is not as dormant as some plants get when it is too cold in the winter and still needs water and other nutrients.  Then, when it cools off at night (even as hot as its been here, it gets down to the high 70's - low 80's at night this time of year), the plant will resume growth and most other processes.  I've observed the most growth on closely monitored plants in the morning after a cool (or at least somewhat cooler) night.  

Even 'drought tolerant' and desert native plants behave this way to a greater or lesser degree. It's part of what makes them able to live in such hot places as they are better at shutting down and insulating their stems and leaves from outside heat than plants from wetter, cooler places are.  So, we increase our watering times from the once a day schedule in late Spring (the weather, never what the calendar says) to two times a day (early morning and early evening - never water in the middle of the night as that's a ticket to fungal problems) in June to ever six hours or so during the day when it is above 110. 

We can do this without over-watering the plants because we are using soaker hoses which put out about 1/4 a gallon of water a minute for every 10 feet of hose under the typical house's hose bib delivery capacity of 30 gallons per minute.  And we run the hoses for 30 minutes each time. That comes to a total of 3 gallons per foot of hose covered area each day.  This is enough, when you estimate losses from evaporation, to get about an inch of water in the top 2 inches of the soil (if the soil drains well) and hopefully, part of an inch soaked down deeper into the soil to encourage a deeper, better root system.  Evaporation is not a total loss though, because it helps cool the soil, plants and the air immediately around the plants. Yes, it is good to try to minimize evaporation, which is part of what mulch and shade do, but some evaporation is necessary, especially when it is this hot.

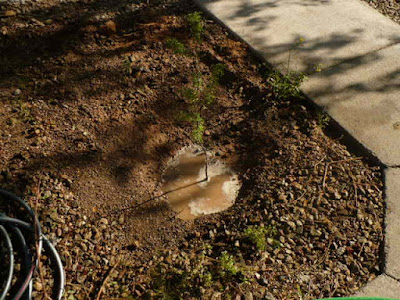
This clay pot without a drain makes a great evaporation basin.

That's why I encourage evaporation pans like these around plants in dry climates. It helps simulate an environment that you'd have near a stream or pool here in the desert where the more showy plants that we like to have live in nature.  This clay pot in the above picture doesn't have a drain hole. I found it at a thrift store and figured it was a perfect little mini-water storage basin.  Placed under the soaker hose, it catches some of the water and stores it, releasing it by evaporation slowly thanks to how small diameter it is relative to how deep it is.  Plants nearby enjoy a somewhat more humid, cooler microclimate like what they'd have at the edge of a pond. 

This volunteer sunflower wilts each afternoon.


   For some plants, all of this effort isn't quite enough, but some are hanging in there and kinda bouncing back by morning like this volunteer sunflower.  This sunflower is getting some water from a soaker hose, so it does well in the morning and early afternoon, but is rather wilty by evening.  If it survives to bloom, great. If not, I won't be terribly surprised. 


These wildflowers are doing just fine.

Other, more desert adapted or native plants are doing much better like these wildflowers from a mix that I broadcast last fall.  In fact, they didn't bloom until a couple of days ago. 


We'll see how everything turns out once things start cooling down again.  I wish you luck with keeping your plants happy (or at least alive) this summer!    


Thursday, June 16, 2016

Experimenting with Amaryllis Flowers

The bulb of an Amaryllis (Hippeastrum spp) flower.

Last winter, my sister was given a big bulb as a gift. Not a light bulb, but a flower bulb in a tiny decorative pot with a tag saying "Amaryllis" on it.  She gave it to me to see if I could grow it and the experiment began. 

I started, as I always try to do, with a little research first.  I looked up Amaryllis to see what it was as I wasn't familiar with it already.  I discovered that it is a native of the tropical and subtropical areas of South America, which doesn't usually bode well for trying to grow it in the Mojave Desert and I don't recommend it as a rule.  But it was only one bulb and it was a gift, so I figured it could be fun to give it a try.  I didn't expect it to do well, not even in the house, since even the house humidity doesn't get very high. 

But then I looked further and found that it's native plant community wasn't a rain forest jungle or anything like that, but rather the plateaus and savannas that are also in parts of South America in the higher elevations.  Those places have cool, somewhat rainy winters and rather warm, dry summers, so it looked slightly more hopeful for our new patient. 

So, we planted it, but kept it in the house in the sunniest room, which turned out to be the wash room with it's South facing door that has a window in it and occasional rises in humidity thanks to the washer and dryer.  It also didn't get too warm in that room since it doesn't have a heat register in it. So, it worked out that we were able to kinda mimic the winter conditions this plant developed under as we gave it occasional water.  I planted it in a terra cotta pot (the best choice for most plants really) with a cactus potting soil mix that has high drainage, low organic matter and no added fertilizer as I knew that such places in the wild are rather harsh environments.  Plants adapted to living in rocky or sandy soil with extended dry periods are actually harmed by babying them too much with really moist, rich soil. 


Amaryllis sends up flower stalk before any leaves elongate.
As you can see in the picture above, we did our best to prevent the roots from getting waterlogged by putting the pot on a plant stand but with the drip tray below the stand to keep water from being absorbed back into the soil.  This is also critical when watering with our local water supply that is high in salts. 

Amaryllis is interesting in that it is among those plants that seems to take forever to do anything with its bulb after it is planted (we planted it with the top half sticking up out of the soil as my sources - several websites by university horticulture departments recommended).  Then, just when you begin to think nothing will happen, the bulb splits open at the top and a green spear emerges!  This develops into the flower stalk and eventually, you see leaf tips emerging from the bulb below it.


Once it got started, it really took off! Now there are two flower stalks.

  The Best place to put our patient wound up being right in front of the air intake vent for the HVAC system, so the plant also got a nice light 'breeze' from the air being drawn in past it every day.  We also put it on this tv tray to keep it up away from the coldest parts of the drafts when someone would open the door that winter. It also kept it from getting knocked over accidentally by passersby.  It looked like this with its big, green spears for several weeks before it showed us why my sister's friend gave it to her....

Isn't it glorious! Soon, there were three spears, each with three of these huge flowers!


Suddenly, our curious green speared thing was a thing of amazing floral beauty!  It began growing these enormous (the size of my palm) flowers as you can see from this picture of the first bloom above.  They had a very pleasant aroma, smelling like really expensive perfume. Some of the scent even went in the HVAC system and scented the whole house. :)  I cut the anthers off the flowers shortly after they developed to keep pollen from spreading though. No one in our house has hay fever, but I figured it was still a good idea, especially if we had guests who did have allergies.  Cutting the anthers off didn't seem to hurt the plant any and the flowers lasted just as long as the websites said they would, about two weeks each.  They reminded me a bit of tiger lilies in form and texture.  Only these have shorter petals and a different structure to the anthers and pistil. 

By the time our winter was over in February, so was the blooming. When the last of the blooms broke down, I cut the flowering stalks off with a very sharp pair of shears cleaned with rubbing alcohol (always a good idea, especially with plants that you aren't sure how sensitive they are to infection yet).  It stayed in the house until my favorite weather service (Weatherunderground.com) stopped forecasting frost for our area.  Then, I moved it outside to the shadiest part of our yard that was also not too cold. At the time, that was the South side of the house up against the North facing wall.  By May, it was getting warm enough that it needed to move to a cooler spot, so I put it along the wall on the East side of the house where it is now.

Shortly after I moved it outside, even though I put it in the shadiest spots, it still lost most of its leaves.  I would have been concerned had I not learned that this is common for plants that are moved from inside to outside, especially ones that have finished their reproductive period.  I'm happy to report, that I've been pleasantly surprised at how well it has recovered and even thrived outdoors.  I wasn't sure if it would grow anything all summer, but it has.


Re-sprouting outdoors. This time, leaves are leading the way.
In this current photo (6/16/16) we have two wonderful leaves!

Interestingly enough, now that it is outdoors where it is drier and warmer, it is growing leaves first.  This picture was taken shortly after it started emerging its first new leaf.  They said that it was a very persistent perennial that can do this for years, but I wasn't sure if that would be the case in our climate. So far, so good as you can see by the current photo that I took this morning.  The plant gets watered twice a day by a soaker hose dripping down on it on a timer, so it doesn't get a lot of water at once, but the soil is being kept from drying out completely. It also has partial shade in the morning and full shade in the afternoon thanks to being under a bid shade tree and the branches I've laid on top of the shelves on this West facing wall that is on the East side of the house so that it gets shade cast on it in the afternoon. 


Natural shade from cut branches works well for partial shade.


Will the Amaryllis bloom again this winter? I have no idea, it's an experiment. Stay tuned!


Thursday, May 26, 2016

A Case of Mistaken Identity

What is this tree?


 The following is a cautionary tale. Don't let this happen to you.  When I first started caring for this property, I was asked "What kind of tree is this big shade tree?"  Rather than taking the time to take some pictures and samples and study the tree in detail, comparing it to tree ID dichotomous keys in my books at home and online; I made the capital mistake of saying the first tree name that popped into my head that roughly fit the description of what I was looking at. 

Actual Ash Trees


I said it was an Ash tree, but wasn't sure which one yet.  I've never been quite able to make up my mind which ash it was as it seemed to fit the general idea of one, but not exactly of any specific species of ash.  While trying to key out another plant that has been popping up in the yard recently, I was diligently studying this new 'weed' (as I should have done with the big shade tree) and was comparing it to samples and pictures of the tree as well as those in other yards in the neighborhood.  It occurred to me suddenly that my 'Ash' tree couldn't be of the Fraxinus genus because it didn't consistently show certain key characteristics.  Yes, it has a lot of opposite branches and frequently produces new branches in nearly matched pairs, but the leaves are actually simple (not compound) and are always produced in an alternate fashion rather than opposite.  I should have known better, since ash trees have compound leaves (that look a lot like individual leaves until you look closely at the pedicels of each leaflet for the buds - which you won't find if they are actually leaflets). 


Each leaf has buds and is produces alternately along the stem. These aren't compound leaves. You can see the frequent matched pairing of branches though which had me fooled into thinking this tree had opposite branches.


I fell for the very Ash-like trunk covered with ash-grey bark and the serrated leaves that seem to be oppositely branched a first glance without studying it closely enough.  The big kicker out of the Fraxinus genera and into the Ulmus though was the leaf bases.  They are very frequently asymmetrical with one side wider and longer than the other.  Ash leaflets have symmetrical bases. 

Note how the leaves seem to be attached crookedly to the stem. They aren't symmetrical like most leaves are.


I felt like a first rate idiot, but in my defense, in the year and half since I've known this tree, I've never seen it bloom nor produce any sort of reproductive structure.  Flowers and seeds are the very best ways to identify plants and are dead give-aways when you finally see them.  Had I seen the distinctive small-winged single seed pods (called 'samara' by botanists) of the Ulmus genera on the tree or scattered below it, I would have known right away that it was an Elm of some sort. 

If only I had seen some seeds! Then it's relatively easy. The seed labeled (e) is Elm while the one labeled (i) is and Ash seed. Can you guess which ones the rest are? A hint is that there are seeds of Fir, Birch, Pine, Sycamore, Maple and Lime Hornbeam in there.


Then, I tried to narrow down which of the many elms it is. That proved difficult as it seemed to have characteristics of several elm species.  That led me to consider that it might be some sort of hybrid, so I looked up elm hybrids and crosses.  I can't be 100% sure, but I am currently leaning toward it being a Sapporo Autumn Gold Elm Ulmus pumilia x Ulmus davidiana var. japonica.  It's a hybrid that was developed at the University of Wisconsin by Eugene Smalley from Siberian and Japanese Elms and has been recommended and planted across the U.S. since the 1980's for its resistance to Dutch Elm Disease, Verticilium Wilt and its drought and high pH tolerance. The drought and high pH tolerance is probably why the first owners of this yard planted it. 
Example of an unpruned Sapporo Autumn Gold from Wikipedia


It is never easy to admit when you are wrong, particularly when you are wrong about something in your own field, but professional integrity and my sense of moral honesty finally won out over the instinct of personal pride and I told my client of my mistake.  We are all human and we all make mistakes. 

Intelligence is what you gain by studying, wisdom is what you gain when you attempt to apply what you have studied.

P.S., I'm still trying to figure out what the other 'mystery plant' is and am doing another wise thing, asking for help from my peers (and in some cases, betters).  Perhaps you know what it is. If so, please comment to this blog post.

The leaves feel dry and papery and are not resinous nor glossy. There must be a coating of very fine 'hairs' on the surface of the leaves as they feel slightly rough when you rub them in a direction towards the leaf base.  They are essentially odorless except for the 'cut grass' smell you get when you crush the leaves.  The stem on the oldest ones (about two months old now) is turning brown and woody suggesting that they might be perennials. I see no sign of flower buds on any of the oldest plants too.

It is growing all over the place where it can get water and shade
This is a roughly two month old plant.
If you see this plant and know its identity, contact us right away.

(This photo looks a bit like a mug shot of a suspect doesn't it?)


Friday, May 20, 2016

First Bloom on Butterfly Bush Recovering From Cat-astauphic Damage


Remember the butterfly bush that we rescued from the clearance rack of 'the orange store' last year?  We carefully pruned the broken branches off it, transplanted it to this bigger pot and eventually planted it in the ground on the East side of the house.


It
recovered well and was doing great.....until the neighborhood cats decided it was a nice thing to lay on and play with that is.   So, then we put this little fence around it with a 'roof' of sticks on top to keep them out.


The cats had broken most of the new branches that had grown on it over the winter after we transplanted it and we weren't sure if it would recover from this. 

But now, it has grown a few new branches and one of them is even blooming!  This is one tough plant and is certainly a good choice for landscaping in our climate of the Mojave Desert.  It gets just a little water every day from the soaker hose that you may see in the pictures above. The hose circles around the plant just outside the dripline (or where the dripline was before the cats mangled the plant).  That seems to be all it needs once it is established and is still this size. As it gets bigger, we'll set up a bigger irrigation system for it using netafin tubing.

It is doing well now, but has really lost a lot of ground compared to where it would be by now had it not suffered cat-astrophic damage.  If you have cats, please keep them inside!  Do not let them run your neighborhood tearing up other people's stuff and turning their yards into outdoor litter boxes.  Much of the upkeep for the yard at this house is trying to clean up after all these loose cats.


First bloom on this butterfly bush since the cats mangled it earlier this spring.

Monday, April 25, 2016

Planting native and naturalized desert plants from a Forest Service Nursery sale.

Girdling roots! (Photo by Missouri Botanical Garden.)

Root flare: how all trees should look. (Photo by Missouri Botanical Garden.)

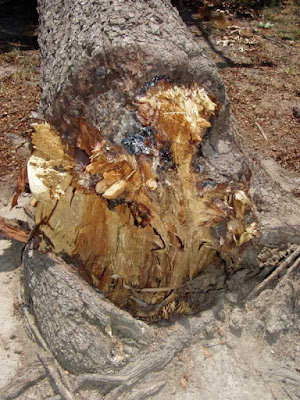
What eventually happens when a tree has girdling roots. May take years, but eventually it kills the tree and there is no solving it once the tree is transplanted. The only cure is prevention through proper growing in the nurseries by transplanting the seedlings from one pot size to the next soon enough to prevent the roots from growing in circles around the inside of the pots.  Another way, if you are patient enough, is to grow shrubs and trees from seed right where you want them to be in the landscape. (Photo by Missouri Botanical Garden.)

Catclaw acacia Acacia greggii
This will grow into a large shrub that has the ability to grow to be about 40 feet tall, but in our Mojave Desert climate, usually never gets any bigger than about 15 feet.  It is native to the Desert Southwest, including Southern Nevada where we are, so it well adapted to our climate and will be low maintenance. It naturally grows in what the Forest Service calls 'Desert Wash' plant communities which include salt cedar Tamarix ramosissma, velvet mesquite P. velutina and desert broom weed Gutierrezia sarothrae.  


Example of a Desert Wash in the Mojave Desert (photographed by Eric Frisbee)

 Such plant communities are places with infrequent, but heavy influx of water during the Spring and Fall rainy seasons, so it will be best to plant it where it will only be hand watered about once a week at first and maybe only once a month once fully established. I'll give it a deep soak at those times.  I'll also be able to plant it in full sun without having to worry about sun scald damage. 

I chose this particular specimen from the many at the Nevada Forest Service Nursery sale (you need to find out if you have such a nursery near you and if and when they have plant sales, as you can get locally grown plants at a fraction of what they cost at retail stores or online) because it has a good, sturdy trunk with a well developed root flare at the base of the trunk. I could not find evidence of girdling or circling roots in the pot neither.

Tree seedlings that do not share these characteristics are best avoided because defects at this young stage will continue to haunt the plant all its life. Girdling roots are especially bad because they can lead to premature death of the tree or shrub including potential damage to people and structures when they fall over.   It also has good branch structure that suggests to me that it will seldom need pruned. Tree and shrub seedlings and saplings with co-dominant branches (trunk or large branches of equal or nearly equal size lead to sever damage later on if one isn't pruned off), crazily crossing branches and such are a nightmare to take care of properly.  Evidence of that potential can often be seen even in a sapling this size. It takes a bit of extra time to examine a new plant this carefully, but it is well worth it in the trouble you avoid later on.  
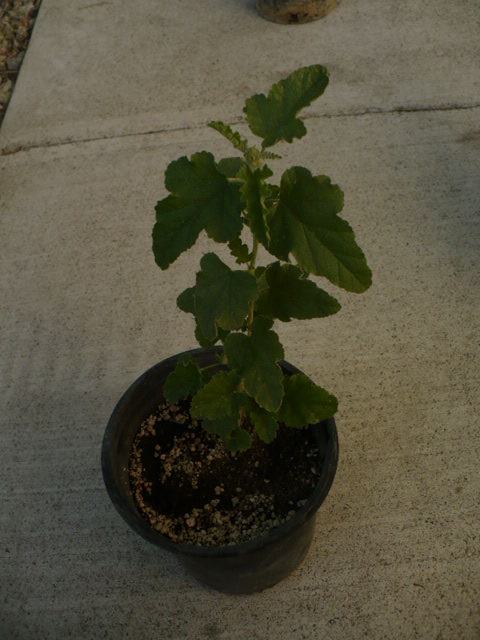


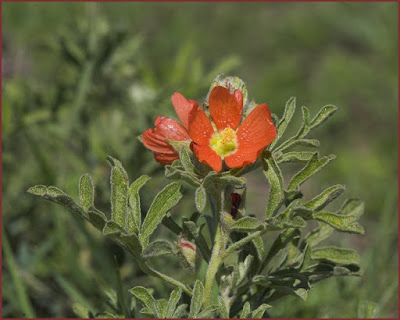
Scarlett Globemallow
Sphaeralcea coccinea
(Nutt.)
What Scarlett globemallow flowers look like. Simple, yet stunning in a group. (from Wildphotosphotography.com)

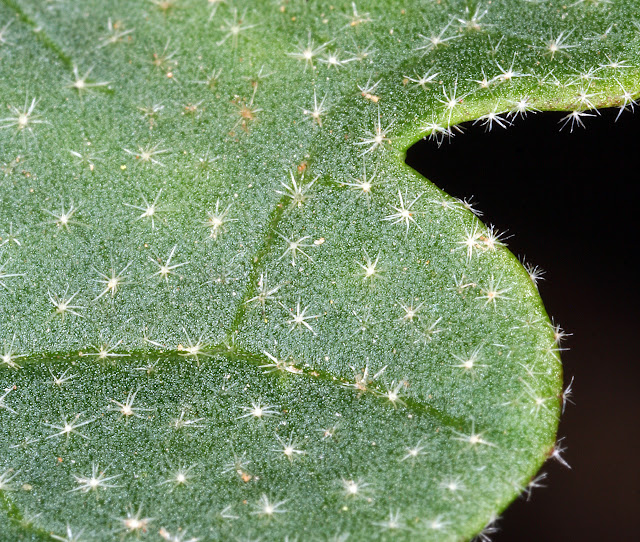
This picture from Western New Mexico University shows the stellate hairs that cover the leaves. Super cool huh? Helps keep the plant from losing too much water in the desert so it can have larger leaves than many desert plants do.
 This is one of my favorite native flowers! I was so glad to see it at the sale that I couldn't resist buying a couple of them.  It's also native to the Desert Southwest and tolerates high pH, calcareous soils and low watering. It blooms in the Summer and can be either a biennial or perennial depending on how severe your winters are. Here in Southern Nevada, I predict it will become a perennial sub-shrub with a little care and watering.  A sub-shrub is a really small shrub that is distinguished from a forb or wildflower because it develops bark on its older stems and continues to grow new material from them, rather than starting over every year with new stems from the root crown like perennial forbs do. This plant has the potential to get up to 16 inches tall and wide, so I'll be giving it plenty of room.  

I love this plant because of its salmon pink flowers in late Spring and Summer until it gets too hot. The leaves are covered with stellate or star-shaped hairs which look really cool under a hand lens. It's also great because it will flower and go to seed year after year. Hopefully, the seeds will come up elsewhere in the bed where I'm planting it and I'll have lots of them eventually. 
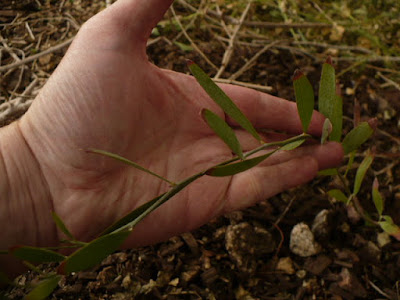
 
Prostrate or Creeping Acacia Acacia redolens
Creeping acacia is a plant that is actually native to Western Australia but they have very much the same climate and soils as our Desert Southwest do, so the plant does really well here. Unlike the plants above (which are much harder to come by), I see this plant used all over Las Vegas in landscaping. I chose it to solve a very specific problem which we'll discuss below. 

It is an evergreen perennial that is relatively short-lived (about 20 years) but quite hardy in our climate, as long as you don't live at an elevation where it gets colder than 15 degrees F. that is.  It will spread as far as it is allowed to (but grows pretty slowly) and gets to be around six feet high, though I imagine that the ones I bought are of the dwarf cultivar 'Low boy' which only gets to be two feet high, judging by the smaller "leaves" they have relative to the size of the stems. The larger growing cultivars usually have bigger "leaves".  I say "leaves" in quotes like that because what this plant and a few other acacias actually have are phyllodes which are modified stems that perform like leaves yet do not have the typical net-like veins that broad-leaf plants have. It's part of what makes this plant do so well in full, hot sun.  It will have tiny, puffball looking yellow flowers in the Spring that aren't much to look at individually, but look and smell nice in large bunches.
What the flowers will look like. Picture from bushandflora.com.au
Soaking the soil to get it ready to dig. An important step in desert gardening.

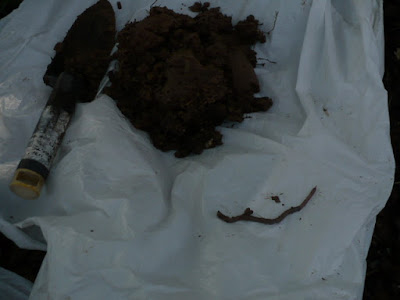
Because we've been mulching this spot for a little over a year and irrigating it for the sake of the rosemary shrubs, it has many of these wonderful little gardener's friends: earthworms!
Where this landscape happens to be located in Las Vegas, it used to be a beach along the saline lake that once filled most of the valley long ago. So, it is blessed with a somewhat lower level of salts and cliche 'clay' (it's really crushed limestone, but kind of acts like clay so the locals call it that) than what is in some other areas of the valley. Instead, the soil in this location is more of a sandy loam. Still, it doesn't hurt to soak the soil before planting to make it easier to dig. It's vital in places with more cliche as those soils are nearly hard as pavement when they are dry.


There is a soaker hose under the mulch just above those rosemary shrubs (which I clip sprigs from for cooking - so good with poultry!) I've planted the Scarlett Globemallow above the hose as it will need less water than the rosemary does.  There is a bit of a slope here (about a 1% slope) so it makes it possible to place plants of different water needs together in the same bed - just place them differently in relation to the water source depending on how drought tolerant they are. The bed is on the South side of the house but is North facing with a cement block wall about five feet tall behind it.
Mexican Bird of Paradise Caesalpinia mexicana  with companion plants of wild mustard.

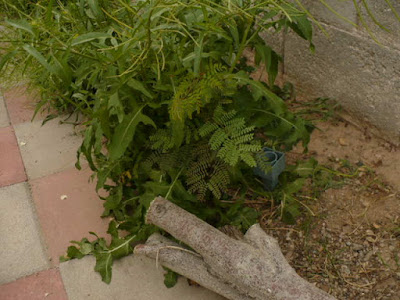
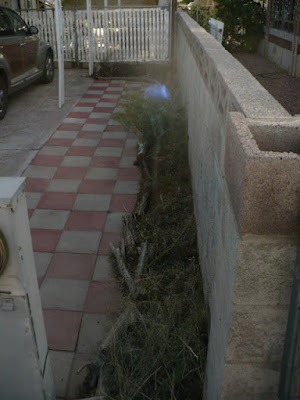
The Creeping Acacia was chosen to eventually fill in a gap between the South wall of the property and the driveway's 'patio' area (where the checkered pavers are).  The gap was left because whoever put up the wall didn't do a good job cleaning up the excess concrete and grout from installing it and just left it to pile up along the wall. So, the guys who put the pavers in later couldn't get them right up against the wall.  I've been trying to grow all sorts of things along there including desert wildflowers, but with no luck. The wind and water just scoured the area too much to get anything to stay. Then, I got the idea of just letting the 'weeds', mostly wild mustard in this case, move in.  I had to convince the HOA that I had a good reason for it in order to keep them though. 

I explained to them that these weren't 'weeds', they were annual flowers that I wanted (mustard does have wonderful yellow, fragrant flowers in the Spring here) and that they were also a cover crop, living mulch or nurse plants for other things I was trying to get started.  It's a common practice among habitat restoration specialists, such as I was back when I worked for the USDA Natural Resources Conservation Service, to allow disturbed areas to be colonized by tough annual plants like wild mustard first in order to develop a micro-climate that is more suitable for other less hardy annuals and eventually perennials to get started. Once the annual 'weeds', or as we called them 'pioneer species', got established for a couple of years, you can broadcast seed in the other annual and perennial forbs, shrubs and grasses that you really want.  It is how I was able to help farmers turn their worn out wheat fields that couldn't even grow enough crop to make the harvest profitable anymore into wildlife habitat through the Conservation Reserve Program (CRP). 

In this case, this gap has had wild mustard and prickly lettuce on it for a year and a half and now and other plants are beginning to get a foothold, including this Mexican Bird of Paradise in the picture.  Once that plant showed up and started doing well, I knew that a micro-climate suitable for a longer lived perennial like Creeping Acacia had been created. 
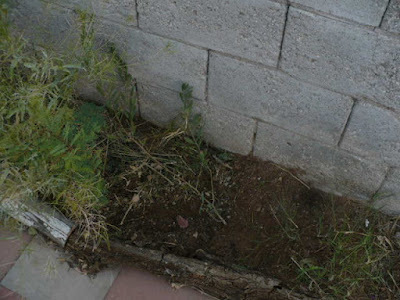
 
Creeping Acacia planted in the gap.

Cut Wild Mustard for temporary mulch until 'HOA approved' woodchip mulch can be applied. The log bed border helps hold it in place as does the cut stem bases intentionally pointed toward the West where most of the wind swirls in from.

Now that the wood-chip mulch has been installed, the HOA might be happy. It'll stay put now too thanks to roots and still-intact trunks from the wild mustard underneath it.
Creeping acacia doesn't need much room to grow and can handle fairly harsh conditions once the soil is stabilized (which is what the mustard did).  I've cut (not pulled up) most of the mustard out of the way and left the roots in the ground to add organic matter and help keep the soil held in place.  I left one of the bigger mustards next to the Bird of Paradise to let it continue to shelter that seedling. 

Creeping acacia often grows its stems in a recumbent or laid over way naturally, so I wasn't concerned about the way some of them were laid over in the pots, I just focused on checking for circling roots and unhealthy looking stems. The ones I found looked really good.  A few had brown tips on the phyllodes, but that's normal for them when they are starting out in a dry place like we have. 
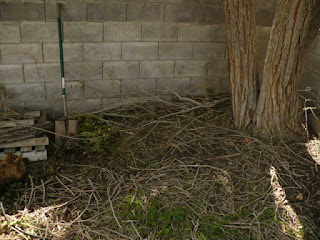


Another good site for Creeping Acacia. Ground cover under trees helps them do better in rock mulched landscaping.

I've been trying to keep the soil from getting so hot and dry under the trees on this property by putting down wood chip mulch and letting small dead branches stay on the ground. It helps, but what is even better is a living ground cover. So, we also planted a couple of Creeping Acacias here.  They handle partial shade as well as full sun well, so they'll do well here. 
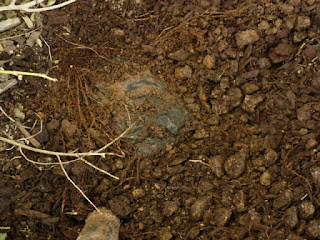
One of the problems you run into when planting in 'rock mulched' landscapes: weed barrier plastic!
I hate, hate 'weed barrier' materials! I beg of you not to use them when you put mulch of any kind down.  They suffocate the roots of anything you actually want that you plant in the ground. They also heat the soil here in the desert making it difficult to keep the roots cool.  The solution to preventing weeds in mulch is to make the layer of it at least three inches deep and to rake it at least once a year.

I had to cut out and pull up as much of this plastic as I could before I could plant the acacia. Not a fun job, but necessary for plant success.

I found this layer of almost pure sand underneath. It's wet in the picture because I soaked the hole after I got the plastic out of the way. It was nearly bone dry under that plastic when I pulled it up despite the fact that I water under that tree daily. The plastic makes the water run off rather than soak in. Finding this, I got out my handheld aerator and went to town around the tree, punching more holes in the plastic.

The sand under the plastic isn't a deal breaker in the case of Creeping Acacia as it can grow in sandy soil just fine, but some plants, even some desert plants, can't do too well in it. Had I picked one of those, I'd have either had to plant something else or dig all of that sand layer out.   


It wasn't easy, but I got the Creeping Acacia properly planted. Worth the effort to do it right.

Site for the Catclaw Acacia

The spot that we got the Catclaw Acacia for used to have an Ash tree (probably a Velvet Ash) tree growing there. It was starting to get way too big for the space though and it had to be cut out.  You can see the stump of it (painted grey to discourage re-sprouting) way, way too close to the house.  That's why we are placing this shrub farther away from the house and closer to the sidewalk. It's a private sidewalk in the back of the house, so it won't have to be pruned to death to satisfy the HOA when it gets bigger, like trees do along the public sidewalks. 

This is also a good site as it gets some shade in the early afternoon and it is in a little bit of a swale, thanks to yours truly digging it last year to prevent water from running towards the foundation of the house. This will mimic the desert wash terrain that the shrub is native to fairly well.  I'll be able to give it a nice soak periodically, yet keep it fairly dry the rest of the time here.
The created swale mimics the hydrology of a desert wash. 

I was careful to plant this, and all of the plants in this blog, so that the root flare (the place where the trunk transitions into the rootball) is above the soil. I made sure that each plant had been grown that way in the pots too when I bought them.  Perennial plants are just healthier for their lifetime when they are grown this way for a host of reasons, one of which is that the root system doesn't get easily drowned or suffocated that way.  Remember that plant roots actually breathe in oxygen and give off carbon dioxide just like animals do, only through pores in the roots' surface instead of with lungs.


Custom built wind protection - much better than staking!

 After I planted the shrub, it occurred to me that such a tall and kind of spindly, even though it was the most robust of the bunch I saw at the sale, plant will need some protection from the wind. In the wild, saplings like this are protected by the mature shrubs, trees, grass, etc. around them.  But in a situation like this, they need some help from the humans who put them in this predicament in the first place :)  Thank goodness, this nursery knew better than to tie a 'nursery stake' to the trunk of this shrub while it was growing in the pots, so it has a fairly strong trunk already. However, I still need to stabilize it so that the rootball doesn't move around in the hole as the trunk sways around.  Once the rootball has sent out roots into the surrounding soil and has anchored itself in place, I can remove the supports. 

The last thing I wanted to do was to put it in a vice like grip of the traditional tree staking methods. All they do is wind up making the plant weaker at best and can even cause it to become severely damaged at worst.   Plant trunks and stems only grow as strong as they need to for the situation they are in.  Swaying in the breeze and/or being bumped into by other things stimulates the cells in the plant stems to grow thicker cell walls and for the plant to lay down more of the tougher more fibrous tissues that makes it stronger.  Even house plants can be made stronger by gently swatting them around as you are watering them or blowing a strong fan on them. 


No!

No!

No!
Oh heck no! Look at how deformed the trunk is even growing.

No! What good could this possibly do other than to suffocate the trunk?

The above pictures labeled 'no' are just some of the many ways people, who don't know any better, wind up torturing their plants rather than helping them. 

The way I did it is better because it allows the trunk to sway around enough to make it stronger without swaying so much that the rootball will move around in the hole.  It also is padded so that the bark won't get damaged by bumping into the sides of the cage. 

Note on the video below: you may want to turn your volume down before watching it as the sound of the wind was picked up by my camera's microphone.
Yes!

 All I did was take a large tomato cage, that you can get in any garden department, and drove it into the ground on the outside of the rootball (never stake anything into the rootball as it damages the roots and won't help stabilize the tree at all,) then padded the sides of the cage with pieces of pool noodle.  Then, I drove a rubber coated metal plant stake into the ground in the soil outside of where I dug so that it would be more secure in the undisturbed ground and tied the cage (not the poor tree!) to the stake.  I then anchored the cage down with these logs just in case the wind got strong. We've been known to have winds over 40 mph in our area so it doesn't hurt to take precautions.  Once the rootball has sent out roots into the surrounding soil and has anchored itself in place, I'll remove the cage (probably about two months from when I planted it, though I'll make sure then by giving the trunk a good shake and see if the soil cracks around the base of the trunk. If it does, I'll fill the crack in, and put the cage back on.)

Planting all of that was fun, but now it's time for a rest. My shoulder still isn't 100%, so I've got to do some stretches (we really ought to stretch before and after gardening anyway to prevent injury, just like we do when we exercise since it's physical work) and then ice it down for a while.