 |
| Girdling roots! (Photo by Missouri Botanical Garden.) |
 |
| Root flare: how all trees should look. (Photo by Missouri Botanical Garden.) |
|
 |
| What eventually happens when a tree has girdling roots. May take years, but eventually it kills the tree and there is no solving it once the tree is transplanted. The only cure is prevention through proper growing in the nurseries by transplanting the seedlings from one pot size to the next soon enough to prevent the roots from growing in circles around the inside of the pots. Another way, if you are patient enough, is to grow shrubs and trees from seed right where you want them to be in the landscape. (Photo by Missouri Botanical Garden.) |
 |
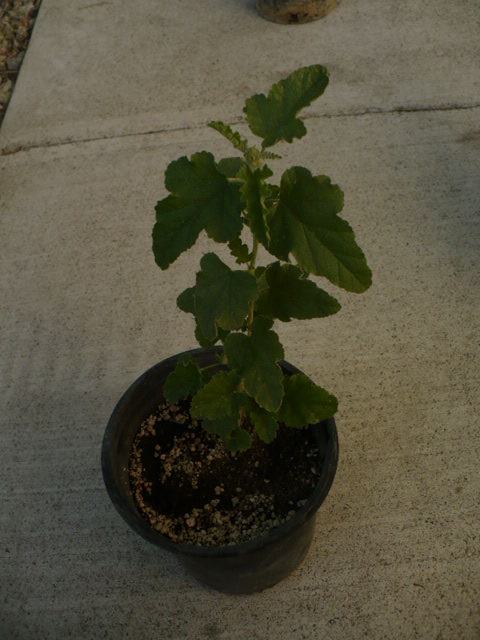
| Catclaw acacia Acacia greggii |
This will grow into a large shrub that has the ability to grow to be about 40 feet tall, but in our Mojave Desert climate, usually never gets any bigger than about 15 feet. It is native to the Desert Southwest, including Southern Nevada where we are, so it well adapted to our climate and will be low maintenance. It naturally grows in what the Forest Service calls 'Desert Wash' plant communities which include salt cedar
Tamarix ramosissma, velvet
mesquite
P. velutina and desert broom weed
Gutierrezia sarothrae.
 |
| Example of a Desert Wash in the Mojave Desert (photographed by Eric Frisbee) |
Such plant communities are places with infrequent, but heavy influx of water during the Spring and Fall rainy seasons, so it will be best to plant it where it will only be hand watered about once a week at first and maybe only once a month once fully established. I'll give it a deep soak at those times. I'll also be able to plant it in full sun without having to worry about sun scald damage.
I chose this particular specimen from the many at the Nevada Forest Service Nursery sale (you need to find out if you have such a nursery near you and if and when they have plant sales, as you can get locally grown plants at a fraction of what they cost at retail stores or online) because it has a good, sturdy trunk with a well developed root flare at the base of the trunk. I could not find evidence of girdling or circling roots in the pot neither.
Tree seedlings that do not share these characteristics are best avoided because defects at this young stage will continue to haunt the plant all its life. Girdling roots are especially bad because they can lead to premature death of the tree or shrub including potential damage to people and structures when they fall over. It also has good branch structure that suggests to me that it will seldom need pruned. Tree and shrub seedlings and saplings with co-dominant branches (trunk or large branches of equal or nearly equal size lead to sever damage later on if one isn't pruned off), crazily crossing branches and such are a nightmare to take care of properly. Evidence of that potential can often be seen even in a sapling this size. It takes a bit of extra time to examine a new plant this carefully, but it is well worth it in the trouble you avoid later on.
 |
Scarlett Globemallow
Sphaeralcea coccinea
(Nutt.)
|
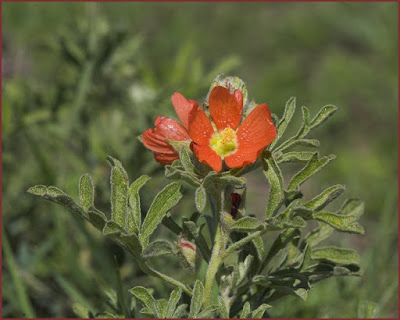 |
| What Scarlett globemallow flowers look like. Simple, yet stunning in a group. (from Wildphotosphotography.com) |
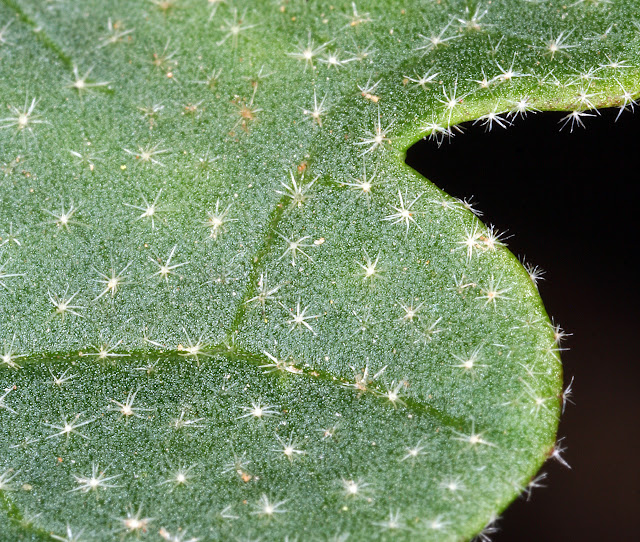 |
| This picture from Western New Mexico University shows the stellate hairs that cover the leaves. Super cool huh? Helps keep the plant from losing too much water in the desert so it can have larger leaves than many desert plants do. |
This is one of my favorite native flowers! I was so glad to see it at the sale that I couldn't resist buying a couple of them. It's also native to the Desert Southwest and tolerates high pH, calcareous soils and low watering. It blooms in the Summer and can be either a biennial or perennial depending on how severe your winters are. Here in Southern Nevada, I predict it will become a perennial sub-shrub with a little care and watering. A sub-shrub is a really small shrub that is distinguished from a forb or wildflower because it develops bark on its older stems and continues to grow new material from them, rather than starting over every year with new stems from the root crown like perennial forbs do. This plant has the potential to get up to 16 inches tall and wide, so I'll be giving it plenty of room.
I love this plant because of its salmon pink flowers in late Spring and Summer until it gets too hot. The leaves are covered with stellate or star-shaped hairs which look really cool under a hand lens. It's also great because it will flower and go to seed year after year. Hopefully, the seeds will come up elsewhere in the bed where I'm planting it and I'll have lots of them eventually.
 |
| Prostrate or Creeping Acacia Acacia redolens |
Creeping acacia is a plant that is actually native to Western Australia but they have very much the same climate and soils as our Desert Southwest do, so the plant does really well here. Unlike the plants above (which are much harder to come by), I see this plant used all over Las Vegas in landscaping. I chose it to solve a very specific problem which we'll discuss below.
It is an evergreen perennial that is relatively short-lived (about 20 years) but quite hardy in our climate, as long as you don't live at an elevation where it gets colder than 15 degrees F. that is. It will spread as far as it is allowed to (but grows pretty slowly) and gets to be around six feet high, though I imagine that the ones I bought are of the dwarf cultivar 'Low boy' which only gets to be two feet high, judging by the smaller "leaves" they have relative to the size of the stems. The larger growing cultivars usually have bigger "leaves". I say "leaves" in quotes like that because what this plant and a few other acacias actually have are phyllodes which are modified stems that perform like leaves yet do not have the typical net-like veins that broad-leaf plants have. It's part of what makes this plant do so well in full, hot sun. It will have tiny, puffball looking yellow flowers in the Spring that aren't much to look at individually, but look and smell nice in large bunches.
 |
| What the flowers will look like. Picture from bushandflora.com.au |
|
 |
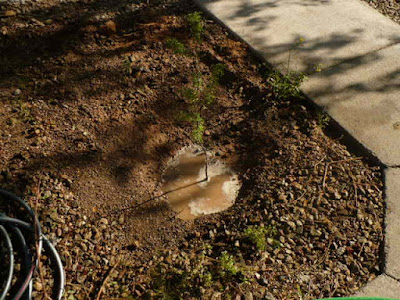
| Soaking the soil to get it ready to dig. An important step in desert gardening. |
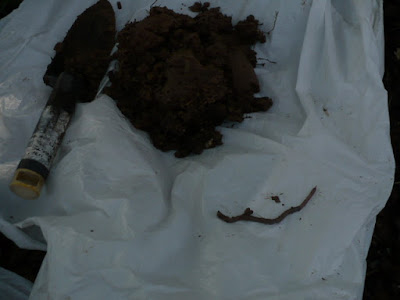 |
| Because we've been mulching this spot for a little over a year and irrigating it for the sake of the rosemary shrubs, it has many of these wonderful little gardener's friends: earthworms! |
|
Where this landscape happens to be located in Las Vegas, it used to be a beach along the saline lake that once filled most of the valley long ago. So, it is blessed with a somewhat lower level of salts and cliche 'clay' (it's really crushed limestone, but kind of acts like clay so the locals call it that) than what is in some other areas of the valley. Instead, the soil in this location is more of a sandy loam. Still, it doesn't hurt to soak the soil before planting to make it easier to dig. It's vital in places with more cliche as those soils are nearly hard as pavement when they are dry.
 |
There is a soaker hose under the mulch just above those rosemary shrubs (which I clip sprigs from for cooking - so good with poultry!) I've planted the Scarlett Globemallow above the hose as it will need less water than the rosemary does. There is a bit of a slope here (about a 1% slope) so it makes it possible to place plants of different water needs together in the same bed - just place them differently in relation to the water source depending on how drought tolerant they are. The bed is on the South side of the house but is North facing with a cement block wall about five feet tall behind it.
|
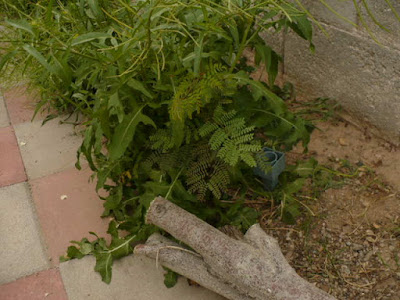 |
Mexican Bird of Paradise Caesalpinia mexicana with companion plants of wild mustard.
|
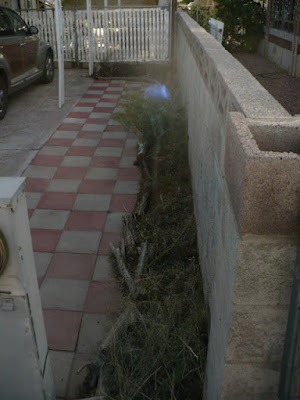
The Creeping Acacia was chosen to eventually fill in a gap between the South wall of the property and the driveway's 'patio' area (where the checkered pavers are). The gap was left because whoever put up the wall didn't do a good job cleaning up the excess concrete and grout from installing it and just left it to pile up along the wall. So, the guys who put the pavers in later couldn't get them right up against the wall. I've been trying to grow all sorts of things along there including desert wildflowers, but with no luck. The wind and water just scoured the area too much to get anything to stay. Then, I got the idea of just letting the 'weeds', mostly wild mustard in this case, move in. I had to convince the HOA that I had a good reason for it in order to keep them though.
I explained to them that these weren't 'weeds', they were annual flowers that I wanted (mustard does have wonderful yellow, fragrant flowers in the Spring here) and that they were also a cover crop, living mulch or nurse plants for other things I was trying to get started. It's a common practice among habitat restoration specialists, such as I was back when I worked for the USDA Natural Resources Conservation Service, to allow disturbed areas to be colonized by tough annual plants like wild mustard first in order to develop a micro-climate that is more suitable for other less hardy annuals and eventually perennials to get started. Once the annual 'weeds', or as we called them 'pioneer species', got established for a couple of years, you can broadcast seed in the other annual and perennial forbs, shrubs and grasses that you really want. It is how I was able to help farmers turn their worn out wheat fields that couldn't even grow enough crop to make the harvest profitable anymore into wildlife habitat through the Conservation Reserve Program (CRP).
In this case, this gap has had wild mustard and prickly lettuce on it for a year and a half and now and other plants are beginning to get a foothold, including this Mexican Bird of Paradise in the picture. Once that plant showed up and started doing well, I knew that a micro-climate suitable for a longer lived perennial like Creeping Acacia had been created.
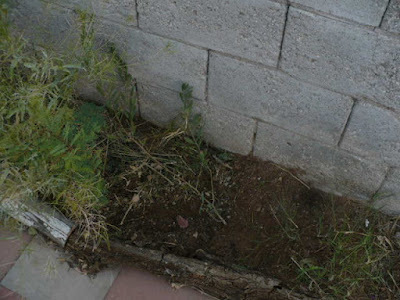 |
| Creeping Acacia planted in the gap. |
 |
Cut Wild Mustard for temporary mulch until 'HOA approved' woodchip mulch can be applied. The log bed border helps hold it in place as does the cut stem bases intentionally pointed toward the West where most of the wind swirls in from.
 |
| Now
that the wood-chip mulch has been installed, the HOA might be happy.
It'll stay put now too thanks to roots and still-intact trunks from the
wild mustard underneath it. |
|
Creeping acacia doesn't need much room to grow and can handle fairly harsh conditions once the soil is stabilized (which is what the mustard did). I've cut (not pulled up) most of the mustard out of the way and left the roots in the ground to add organic matter and help keep the soil held in place. I left one of the bigger mustards next to the Bird of Paradise to let it continue to shelter that seedling.
Creeping acacia often grows its stems in a recumbent or laid over way naturally, so I wasn't concerned about the way some of them were laid over in the pots, I just focused on checking for circling roots and unhealthy looking stems. The ones I found looked really good. A few had brown tips on the phyllodes, but that's normal for them when they are starting out in a dry place like we have.
 |
| Another good site for Creeping Acacia. Ground cover under trees helps them do better in rock mulched landscaping. |
I've been trying to keep the soil from getting so hot and dry under the trees on this property by putting down wood chip mulch and letting small dead branches stay on the ground. It helps, but what is even better is a living ground cover. So, we also planted a couple of Creeping Acacias here. They handle partial shade as well as full sun well, so they'll do well here.
 |
| One of the problems you run into when planting in 'rock mulched' landscapes: weed barrier plastic! |
I hate, hate 'weed barrier' materials! I beg of you not to use them when you put mulch of any kind down. They suffocate the roots of anything you actually want that you plant in the ground. They also heat the soil here in the desert making it difficult to keep the roots cool. The solution to preventing weeds in mulch is to make the layer of it at least three inches deep and to rake it at least once a year.
I had to cut out and pull up as much of this plastic as I could before I could plant the acacia. Not a fun job, but necessary for plant success.
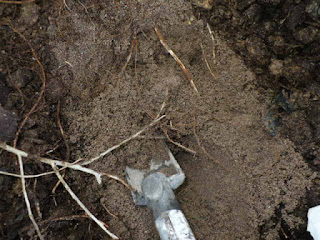 |
| I found this layer of almost pure sand underneath. It's wet in the picture because I soaked the hole after I got the plastic out of the way. It was nearly bone dry under that plastic when I pulled it up despite the fact that I water under that tree daily. The plastic makes the water run off rather than soak in. Finding this, I got out my handheld aerator and went to town around the tree, punching more holes in the plastic. |
The sand under the plastic isn't a deal breaker in the case of Creeping Acacia as it can grow in sandy soil just fine, but some plants, even some desert plants, can't do too well in it. Had I picked one of those, I'd have either had to plant something else or dig all of that sand layer out.
 |
It wasn't easy, but I got the Creeping Acacia properly planted. Worth the effort to do it right.
|
 |
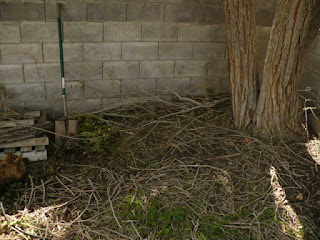
| Site for the Catclaw Acacia |
The spot that we got the Catclaw Acacia for used to have an Ash tree (probably a Velvet Ash) tree growing there. It was starting to get way too big for the space though and it had to be cut out. You can see the stump of it (painted grey to discourage re-sprouting) way, way too close to the house. That's why we are placing this shrub farther away from the house and closer to the sidewalk. It's a private sidewalk in the back of the house, so it won't have to be pruned to death to satisfy the HOA when it gets bigger, like trees do along the public sidewalks.
This is also a good site as it gets some shade in the early afternoon and it is in a little bit of a swale, thanks to yours truly digging it last year to prevent water from running towards the foundation of the house. This will mimic the desert wash terrain that the shrub is native to fairly well. I'll be able to give it a nice soak periodically, yet keep it fairly dry the rest of the time here.
 |
| The created swale mimics the hydrology of a desert wash. |
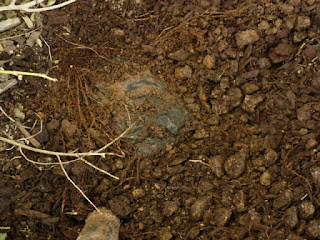
I was careful to plant this, and all of the plants in this blog, so that the root flare (the place where the trunk transitions into the rootball) is above the soil. I made sure that each plant had been grown that way in the pots too when I bought them. Perennial plants are just healthier for their lifetime when they are grown this way for a host of reasons, one of which is that the root system doesn't get easily drowned or suffocated that way. Remember that plant roots actually breathe in oxygen and give off carbon dioxide just like animals do, only through pores in the roots' surface instead of with lungs.
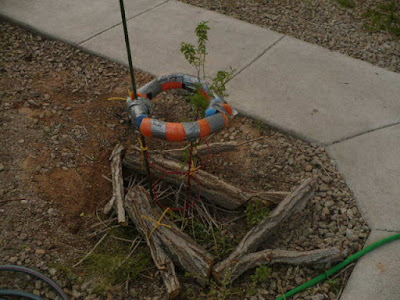 |
| Custom built wind protection - much better than staking! |
After I planted the shrub, it occurred to me that such a tall and kind of spindly, even though it was the most robust of the bunch I saw at the sale, plant will need some protection from the wind. In the wild, saplings like this are protected by the mature shrubs, trees, grass, etc. around them. But in a situation like this, they need some help from the humans who put them in this predicament in the first place :) Thank goodness, this nursery knew better than to tie a 'nursery stake'
to the trunk of this shrub while it was growing in the pots, so it has a
fairly strong trunk already. However, I still need to stabilize it so that the rootball doesn't move around in the hole as the trunk sways around. Once the rootball has sent out roots into the surrounding soil and has anchored itself in place, I can remove the supports.
The last thing I wanted to do was to put it in a vice like grip of the traditional tree staking methods. All they do is wind up making the plant weaker at best and can even cause it to become severely damaged at worst. Plant trunks and stems only grow as strong as they need to for the situation they are in. Swaying in the breeze and/or being bumped into by other things stimulates the cells in the plant stems to grow thicker cell walls and for the plant to lay down more of the tougher more fibrous tissues that makes it stronger. Even house plants can be made stronger by gently swatting them around as you are watering them or blowing a strong fan on them.
 |
| No! |
 |
| No! |
 |
| No! |
 |
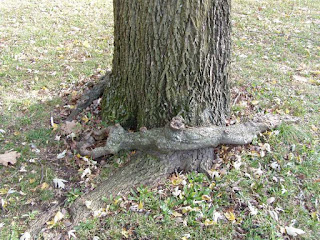
| Oh heck no! Look at how deformed the trunk is even growing. |
 |
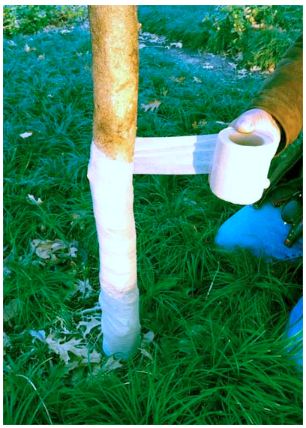
| No! What good could this possibly do other than to suffocate the trunk? |
The above pictures labeled 'no' are just some of the many ways people, who don't know any better, wind up torturing their plants rather than helping them.
The way I did it is better because it allows the trunk to sway around enough to make it stronger without swaying so much that the rootball will move around in the hole. It also is padded so that the bark won't get damaged by bumping into the sides of the cage.
Note on the video below: you may want to turn your volume down before watching it as the sound of the wind was picked up by my camera's microphone.
 |
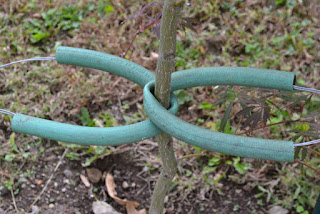
| Yes! |
All I did was take a large tomato cage, that you can get in any garden department, and drove it into the ground on the outside of the rootball (never stake anything into the rootball as it damages the roots and won't help stabilize the tree at all,) then padded the sides of the cage with pieces of pool noodle. Then, I drove a rubber coated metal plant stake into the ground in the soil outside of where I dug so that it would be more secure in the undisturbed ground and tied the cage (not the poor tree!) to the stake. I then anchored the cage down with these logs just in case the wind got strong. We've been known to have winds over 40 mph in our area so it doesn't hurt to take precautions. Once the rootball has sent out roots into the surrounding soil and has anchored itself in place, I'll remove the cage (probably about two months from when I planted it, though I'll make sure then by giving the trunk a good shake and see if the soil cracks around the base of the trunk. If it does, I'll fill the crack in, and put the cage back on.)
Planting all of that was fun, but now it's time for a rest. My shoulder still isn't 100%, so I've got to do some stretches (we really ought to stretch before and after gardening anyway to prevent injury, just like we do when we exercise since it's physical work) and then ice it down for a while.